
This guide shows you one way to find and buy some of the cheapest stock images for commercial use. This simple process can save you huge amounts of money over the long-term.
The prices here are in USD, but they can be purchased from anywhere in the world.
Example of a cheap stock photo
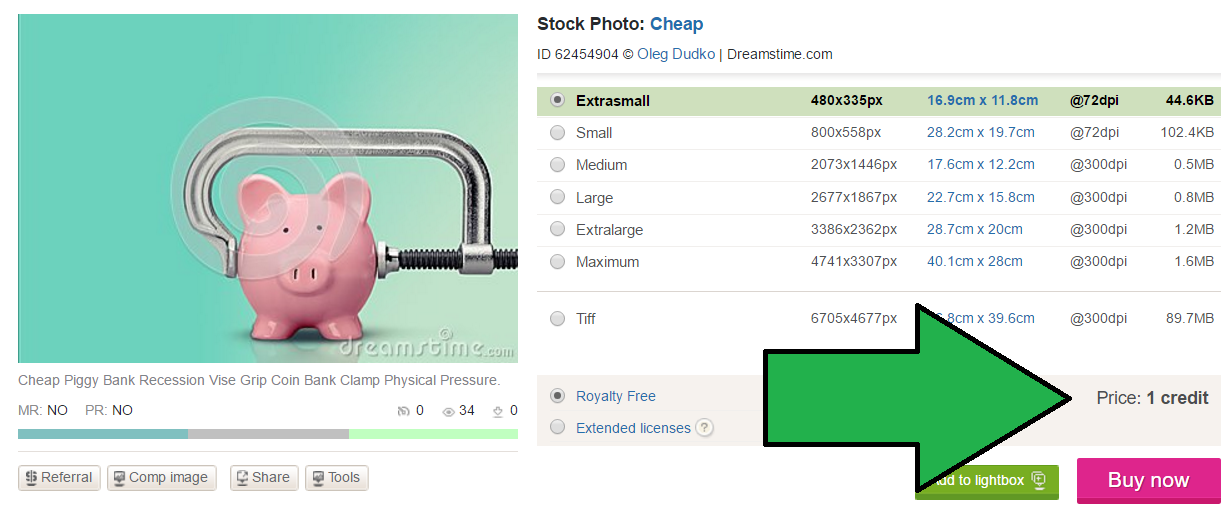
I wanted to buy an image to use here as an example, it would have been strange not to! I purchased a picture of this piggy bank in a clamp for $1 and then added in the text myself.
Proof of how much it cost is in this screenshot before I downloaded it.
Now we’ve done that let’s get down to the important stuff. This method works whether you want photographs or graphics.
Where to get the photos from
I’ve seen other articles online that simply list online stock photo agencies and tell you that’s where is best. But prices vary. It’s how you go about using them that matters.
For this guide we’ll be using Dreamstime. I’ve used them for over 16 years, since April 2006 to be exact. No joke, here’s a screenshot of my account showing the first file that I downloaded.

In all the years of using Dreamstime I’ve never had a problem. If you don’t have an account don’t worry, it’s an easy website to use and it’s free to create an account.
Understand how stock image pricing works
First we need to understand the pricing structure. There are two factors:
- Prices go up the more times a file is downloaded.
- Prices go up the bigger the file size.
Dreamstime use a levels system. Images that have been listed on their website for 6 months and received no downloads are level 0. They cost from as little as 1 credit. The levels go up to level 5. At that level are images that have been downloaded over 25 times. They start from 11 credits to buy!
Don’t worry too much about the exact value of credits for now, we’ll get on to that later in this guide. For the purpose of this think of 1 credit being $1, or £1 or 1euro or your local currency equivalent. It can actually work out a lot cheaper than that but we’ll cover it further down.
With the levels pricing structure in mind let’s now exploit that.
How to navigate quickly to the most inexpensive files
Now we understand the pricing we want to make sure we only look at level 0 photos. There are two ways we can do it.
These instructions are for use on the desktop version of the Dreamstime website. If you are on a mobile device you won’t have the advanced search option we will now use I’m afraid.
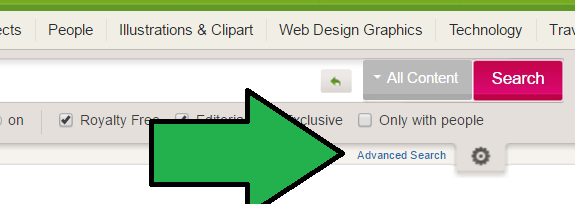
Let’s start from the homepage. You need to click the small link called ‘advanced search’. It’s easily missed so here is a screenshot of how it looks.
You’ll see a ‘pricing’ slider on the right-hand side. For level 0 only files you need to move that down so it’s all the way across to the left.
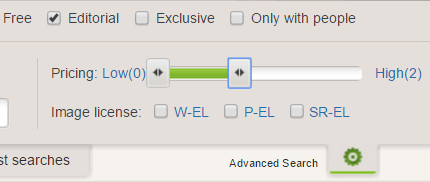
Now type in keywords of the type of photograph you’re looking for. We’re now ready to go, click the big pink ‘Search’ button.

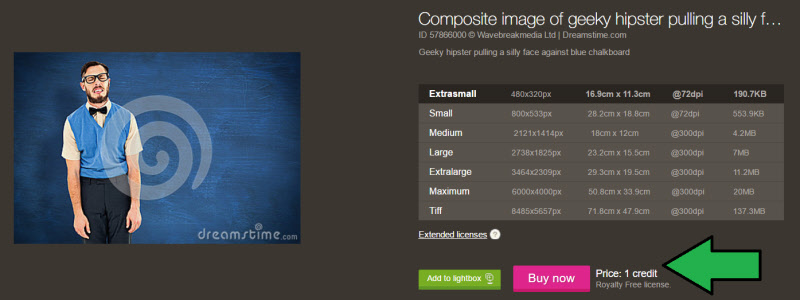
All of the results will now show. Every photo you will see will only cost from 1 credit! These are the cheapest you will find. Depending on how niche your search phrase was you should see lots of really good results. You can move your mouse over the images to check they are level 0.
From here you can start to click on the results you like the look of. It’s now time to browse the prices by clicking on the different sizes on the right-hand side. You can either go on to the full listing or stay on the results page, like this.
If you need an image for a blog post then the smallest size may well be suitable. The smallest size is what I chose for the example of a cheap stock image earlier in this article. If that’s the case then it’s job done for you, $1 cost, awesome! Even if you need one that’s a bit bigger it will still only be a few bucks!
Did you not see many results? If you’re looking for a really niche term you may not see many results. In this case you could change your search term a little bit. Or move the slider across so it will show results from all 5 levels. Then once the search results are showing use the order function to show by the “lowest price” first, this is how it looks. This option is available on mobile devices.
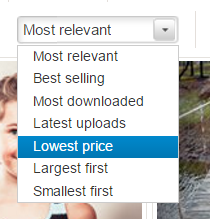
That will show you many more results but still guarantee you see the cheapest at the beginning.
If the smallest size won’t do let’s get on to ways to keep the cost as low as possible.
Two more options to keep your costs low
If the smaller image sizes are suitable then great. If not there are a couple of things you can try and do to keep your costs down. You have two options.
- Buy multiple images for $1 and use a free image editor to stitch them together.
- Find an image with flat colors on the outside and edit with free software to make it bigger.
The first method can be a good way to create a really unique image. For example; let’s pretend you were doing a blog post and wanted a header image that was wide but not very tall. In this case you could buy 3 photos and then edit all the images together to put them side by side. The total cost would be $3. This may work out cheaper compared to buying a huge image that is the correct width but then having to heavily crop it to get the low height.
The second method is what I did with the image at the top of this page! You buy the file at a smaller size and then edit the image to make it bigger. This will depend on the type of image. Some you won’t be able to. In the example I gave earlier of what I purchased, the piggy bank in a clamp, the colors mean it’s quite easy for me to increase it’s size with a bit of editing. Other’s won’t be so simple. To achieve it you need the main background color to be consistent. It can be easier to do for isolated objects.
A final option is not one I’d really recommend. You buy the image at a small size. Open it in your image editor and then export it at a bigger size. This will cause some loss in quality. If the quality isn’t that important or you are only increasing the size a tiny bit then you can get away with doing this. Other than that I wouldn’t recommend it.
Final step – plan ahead with credits or a subscription
This method of saving money all depends on how often you will need stock images. We all have different needs. If you run a popular blog you will need new photographs every single day. For other people it may only be once every month or so. Work out what your specific needs will be over the foreseeable future.
By doing this you can plan ahead. At Dreamstime they have a choice of ways for you to pay for them. You can either buy credit packages or have a subscription. The more you are going to download the cheaper it works out per file. The packages are ideal for those who want no subscription.
I was going to include a screenshot here of the credit packages but they have lots of different currencies for different regions. You can visit their pricing page directly to see what the costs are in your currency. Here is the difference for each credit package and a data table demonstrating the level of savings.
| Credits package | Price difference |
| 10 credits | base price |
| 15 credits | 11.7% saving |
| 30 credits | 14.4% saving |
| 60 credits | 15.3% saving |
| 120 credits | 23.4% saving |
| 260 credits | 28.8% saving |
| 500 credits | 30.6% saving |
| 1000 credits | 33.3% saving |
| 2000 credits | 36.0% saving |
Despite the potential savings don’t fall into the trap of going for a huge package just to bank the deal. The credits are only valid for 1 year. That’s why you need to calculate how many you will use. Get it wrong and you’ll end up with loads of credits expiring and that’s money wasted!
Subscriptions work in a similar way. The more downloads you will make the cheaper it works out per file. Do your calculations and pick which will be best for you.
Benefits to buying stock photos
- Each individual image has very few, or zero, users. Whereas with free stock images they are downloaded hundreds or thousands of times!
- Significantly more choice of what to download.
- Quality of images can be higher.
- Feel comfortable using them for commercial use knowing you are confident of the source.
- Many images are inexpensive meaning a minimal amount out of your budgets.
If you’re taking your online business seriously then buying stock images is a good investment. Not only because it gets you higher quality images but it can also save you time trawling through stock image libraries. It doesn’t have to cost much money either. Let’s get into looking at how to spend as little as possible if budget is an issue.
Your turn to act!
Ultimately you still need to find the perfect picture for your needs. It’s not worth saving a dollar or two and settling for something inadequate. Even though many photos are one dollar it doesn’t mean that’s what you should spend. It’s about getting the cheapest for your needs, not the cheapest overall.
Saving money over the long run will happen if you get in the habit of using these methods. Imagine how many people don’t use these simple tricks! Minimizing outgoing is important in any business. Doing this is a no-brainer.
There are some significant benefits to buying cheap stock photos. Especially for photos of people. You often get model releases. On top of that there’s a huge choice and you can have confidence in the source. This mean not ever needing to worry about legal action like you might with freebies.
Visit Dreamstime now to start getting awesome royalty-free stock photographs for under a dollar. If the premium option doesn’t work for you, check out our list of alternative freebie stock image sites.